Install and Setting up VTS – Part 2
Posted on Jul, 2018 by Tony Gartrell
A Step by Step guide to using the New HPE Virtual Table Server (VTS)
Introduction to the New HPE Virtual Table Server (VTS) – Part 1Install and Setting up VTS – Part 2
Coding for VTS – Part 3
Advanced Topics in VTS – Part 4
Install
This is the easy part. You can find the VTS setup executable under the “Additional Components” folder in the LoadRunner install directory. It is a quick and easy setup that you can do using the default options. You can install the VTS on the same server as the controller, however, it is always recommended to use a standalone server for it. You’ll have the option to select which port the admin console will run on – the default is 4000. By default VTS does not use any authentication or SSL; both can be configured though, so don’t store any sensitive data in VTS without security. The help file in VTS contains some instructions on setting both options up.
NOTE: I haven’t been able to install VTS properly on Windows 7 32-bit. I’ll update this post if I find a fix to the issue.
Setup
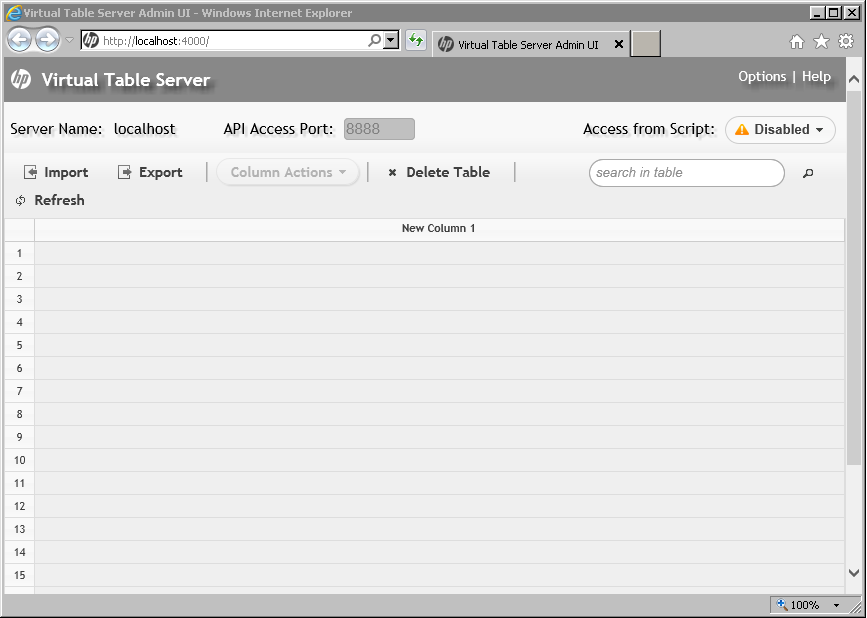
The install should have launched a browser and opened up the console for VTS. If not, you should be able to find the link in your Start menu or open a browser to http://localhost:4000/. You should see something like this: The first thing you want to do is “Enable” access from scripts. This will allow you to connect to VTS for your LoadRunner scripts. It will also ask you for a port number, the default is 8888.
![]()
Column Actions
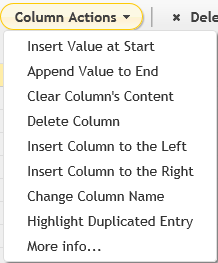
Selecting a column will enable the Column Actions button. This will allow you to manually add and remove data. Under More info you can also index a column to ensure unique values and speed up VTS operations if you are working with large amounts of data.

Help
On the upper right corner of the dashboard you can open up the help section for VTS which will cover more advanced configurations and provides a brief review of the functions.
Next Up:
Coding for VTS – Part 3