LoadRunner 12: Configuring Cloud Load Generators
Posted on Apr, 2014 by Admin
Let’s explore using Load Generators from the Amazon EC2 Cloud in LoadRunner 12. Many people have asked me about it, wondering about any “gotcha’s” that might be out there. I have found a couple. In this blog entry, I want to focus on the configuration and setup of LoadRunner. There is quite a bit to consider.
First, set up an account instance on Amazon EC2. I was able to set up a free account with a Micro instance of a Windows 2012 Standard machine in less than thirty minutes. However, using the Micro instance is not recommended by HP, because the machines created will usually not have enough horsepower to use many Vusers, and this could skew your test results. I used this account strictly to test out the functionality, so this limitation was not an issue. For more information on setting up an AWS account and your first machine in EC2, check out these links:
http://docs.aws.amazon.com/AWSEC2/latest/UserGuide/get-set-up-for-amazon-ec2.html
https://www.youtube.com/watch?v=-xVyuLJZFYc
Multiple Amazon EC2 accounts are allowed, but not multiple accounts using the same access key. Currently, Amazon is the only cloud platform supported in LoadRunner. You’ll need to set up a security group in the EC2 console and add a couple of rules for allowing traffic. The standard port for a Load Generator is 54345. You can change port numbers from the default to something else, just make sure you know which ports things are talking on. If you do not know how to setup security groups and rules for port traffic, check here.
You may need to configure your local machine firewall rules to allow those ports. You may wish to create a Key Pair in Amazon EC2. Why? You may want to login to your EC2 machine instances through RDP/putty, install additional software, or perform troubleshooting on the machine. A key pair allows you to get access to the machine. To learn how to create a key pair on Amazon EC2, check here.
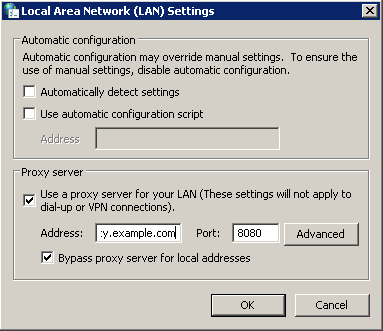
There is no need to have an MI-listener, unless your company’s internal firewall restrictions require it. If behind a proxy server, make the appropriate setting changes that allow communications on the right ports. At a minimum, you will need to address port 54345 for the Load Generator, and possibly port 443 for SSL communication to the Amazon API. These settings can be configured from the Internet Options from the Tools menu within Internet Explorer:
If using a proxy, you may need a custom configuration within the Controller to match. This is where the new Network Profile Manager comes into play.
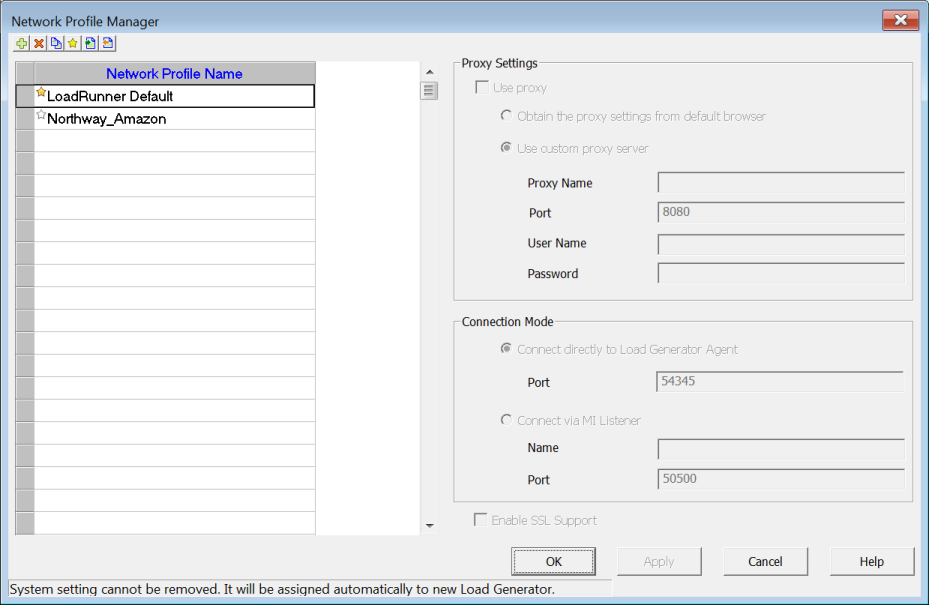
You can set up any number of profiles so that the Controller can talk to the Load Generators.
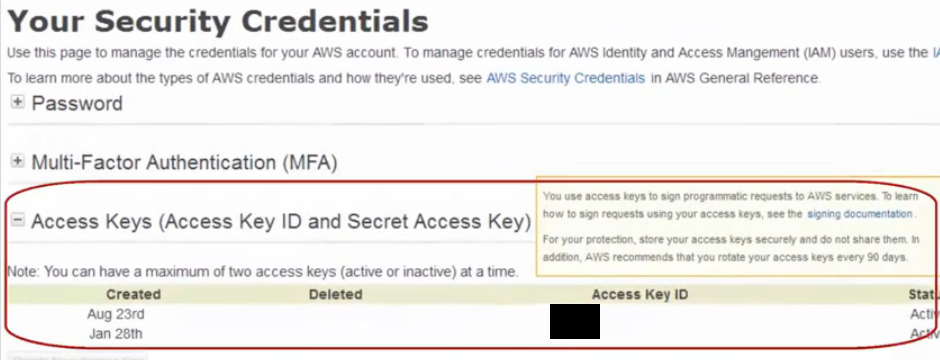
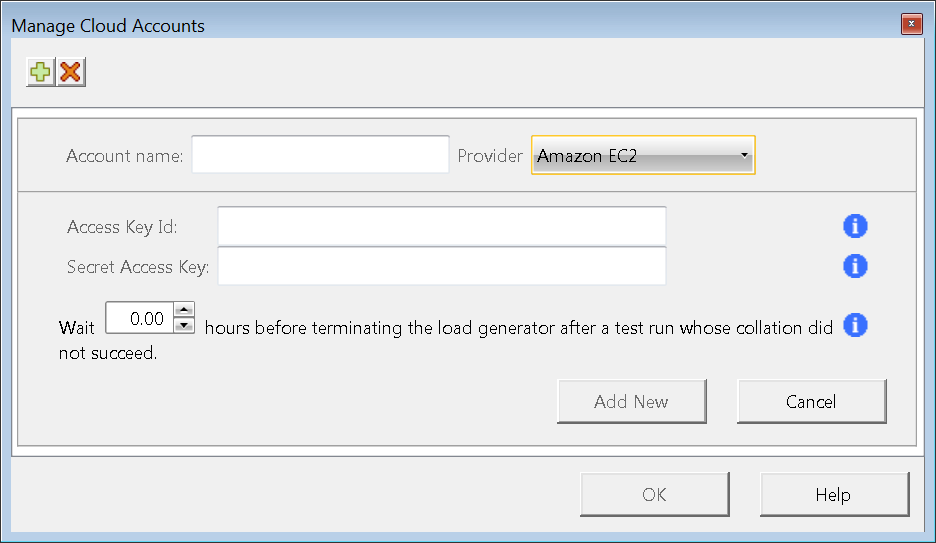
Get the Access Key ID’s and Secret Access Keys from your EC2 console window.
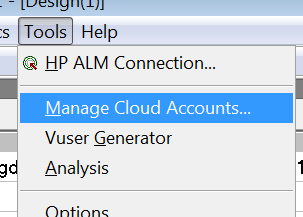
Put this information into the LoadRunner Controller (Tools -> Manage Cloud Accounts).
Once this information is put in, either create machine instances manually within EC2 and install the Load Generator software on them, or provision new machines directly from within LoadRunner.
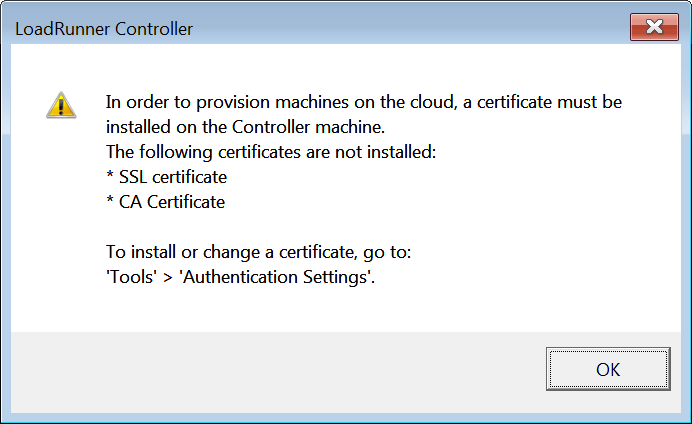
The first time you attempt to Provision a new Load Generator, the following dialog will appear:
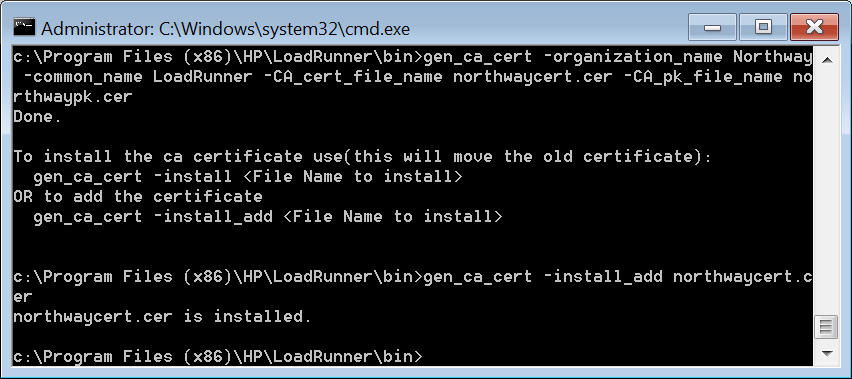
This means that digital certificates for SSL and CA are required. Why? Because SSL encryption is used to communicate between the Controller and cloud Load Generators. We will need a CA (certified authority) file and either a private key or SSL certificate to make this work. Use the gen_ca_cert.exe utility located in the <LoadRunner>/bin directory. See the help documentation for the specific steps on how to create and install the certificates:
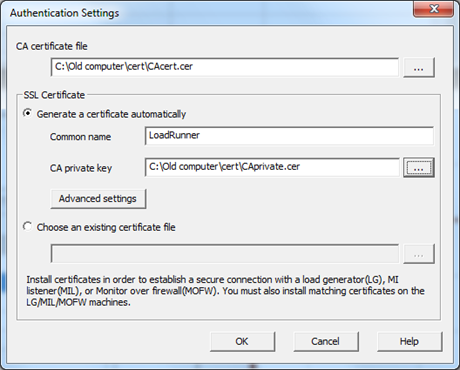
Once the keys have been created and installed, you can set them up in the Controller within Authentication Settings (under the Tools menu):
Ensure that the location is pointing to the correct location of the certificate files. Browse to the file/folder where the keys are and click OK. You will have to restart the Controller for the settings to take. There should be an updated cert.cer file in the <LoadRunner>/DAT/CERT folder (check the date/time creation on the file). WARNING: If you select the radio button for “Choose an existing certificate file”, it will allow you to select your private key and you will not get any error when you press the “OK” button – however, this will not copy over the SSL certificate and you will not be able to connect to the Generator. This has been logged by HP as an enhancement request for LoadRunner 12.1 to provide an error message when this happens.
HP has put out a more detailed information on dealing with certificates, which you can read here.
At this point, we’re ready to start adding Load Generators from the Cloud to our test scenario and begin using them. In my next blog, I will walk through these steps.

