What is LoadRunner’s DFE Part 2 (GWT)
Posted on Aug, 2016 by Tony Gartrell
Previously we looked at using DFE to help make scripts that utilize XML to make it more readable and easier to parameterize. There is another way to use DFE, beyond making a script more readable. Sometimes DFE may be required for the script to run properly. Some applications use what is called GWT (Google Web Toolkit). To use GWT DFE, first you need to identify when an application is using GWT.
There is the obvious way that LoadRunner recognizes GWT. You’ll see the following message in the Error tab of the message section of VuGen:
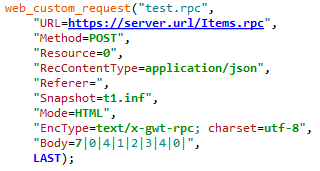
You can recognize gwt usage by looking at the web_custom_request call in the script. The web_custom_request call will have a x-gwt-rpc EncType and also the body of the request will have values separated by pipes (|), like the following request:
Converting GWT is a bit more involved than XML. Before we dig into this, I would highly encourage you to view this informative LoadRunner GTW DFE tutorial on YouTube:
HP LoadRunner 11.50 – Tutorial: GTW DFE
When configuring the DFE for GWT, you will follow the same high level steps that you performed for XML
- Go to Recording Options
- Open the Data Format Extension, Chain Configuration option
- Add a Chains
- Add a Data Format Extension
- Select GWT Extension
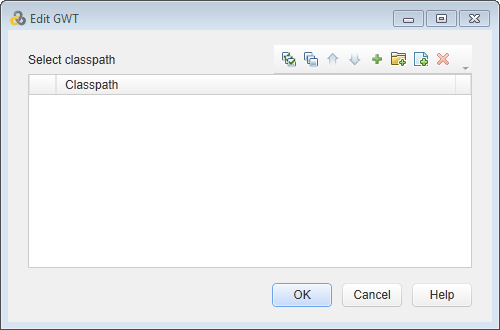
However, this time it will ask for an additional option like the classpath. This is VERY important step. You’ll need access to the .WAR file or all the class paths for the applications GWT library. This needs to be provided to you by the app team. I highly recommend you get the whole .WAR file from them. I don’t recommend an extracted .WAR. It should be a self-contained .WAR since it will contain all the path information that LoadRunner needs. If you don’t have this, you’ll have to add all directories and .jar files you’ll need access to. Often, there may be hundreds of .jar and directories you may have to add hence could get very cumbersome. You will want to put the .WAR file in a location where you will have full access to it. When LoadRunner loads the .WAR, it will extract the file to the current location of the file. This will create the correct directory structure for you to use. Additionally, you’ll need to copy this directory structure to all the Load Generators with the exact same path. I suggest you use the C drive if possible; if not, you need to make sure that drive exists on all the generators. You cannot easily change the path after you record or regenerate your script!

Once you have loaded the .WAR file, you’ll want to set up the Chain Configuration like in the XML post:
- Go to Data Format Extension, Code Generation Recording Options.
- Enable data format extension
- And the Chain to the default Body and Header.
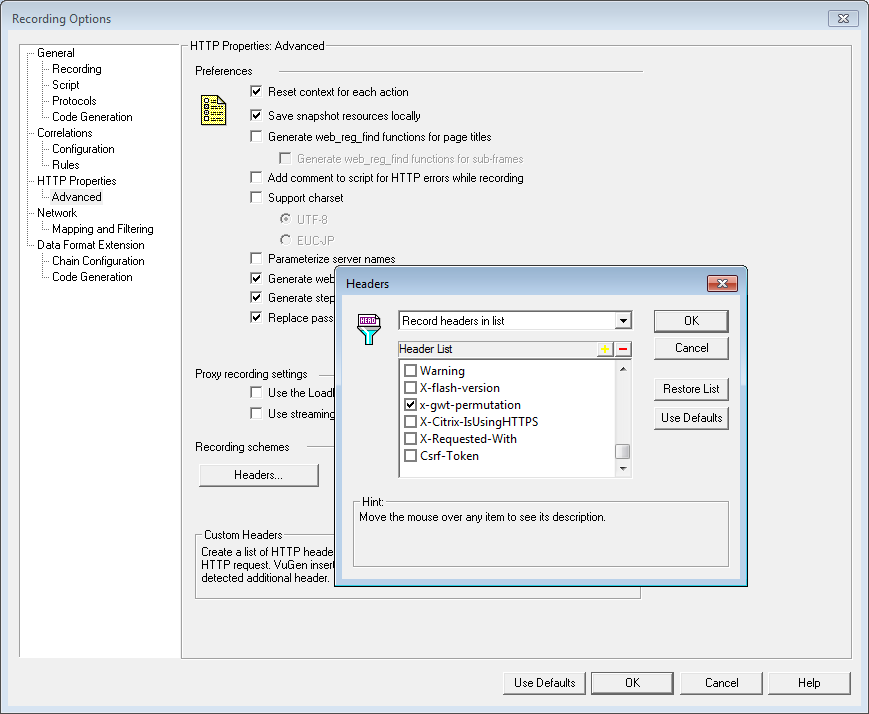
After updating the Data Format Extension section of the Recording Options, you’ll need to update HTTP Properties, Advanced to make sure LoadRunner will record the GWT Header.
- Open HTTP Properties, Advanced Recording Option.
- Under Recording schemes, open Headers…
- Select Record headers in list from the list of values
- Enable x-gwt-permutation
- Click OK
 Now you are ready to record or regenerate your script.
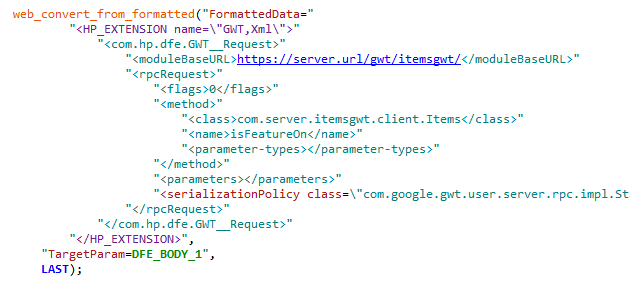
You should now see something like this in your script: 
You can now parameterize or correlate the values in GWT requests like any other web request. You should be able to play the script back with parameter substitution and see the newly formatted request being send to the server.
Important Items to Note!
- As mentioned earlier, you need to copy the extracted .WAR file to all the load generators with the exact same path you used during recording.
- GWT uses OpenJDK which is part of the LoadRunner Install, located in the LoadRunner Install Directorylibopenjdk32. It may be required to update the openjdk depending on GWT versions.
- Since GWT DFE uses a JVM, each vusers takes up an increased amount of memory and additional CPU. I have seen vusers take about 4 MB of memory per vusers along with more CPU. I would suggest 4 CPUs, 8 GB of memory per 1000 vusers.
